Many company videos are filmed in an ordinary office: a meeting room, a quiet corner or the space behind someone’s desk. These rooms are built for working, not filming, so the light is often flat, too harsh from above or mixed with daylight from a window. The good news is that you do not need a large studio to fix this. A few lights and some planning make a clear difference to how professional the result looks.
Start with the room you have
Before you set up any equipment, walk around the space and look at where the light is coming from.
- Ceiling lights usually sit straight above the speaker and create shadows under the eyes and nose. If you can, switch them off or turn off the row directly above your subject.
- Windows give soft, flattering light, but the brightness changes during the day. Place the speaker so the window is to one side of them, not directly behind them, otherwise the camera will turn them into a silhouette.
- Walls and furniture reflect light. A white wall can act as a free reflector, while a strongly coloured wall can add a colour cast to skin tones.
Choose a background with some depth. Sitting the speaker a metre or two away from the wall helps separate them from it and avoids a hard shadow behind their head.
The three-point setup, simplified
Three-point lighting is the classic approach for interviews and talking-head videos, and it works well in small rooms.
- Key light. Your main light, placed at roughly 45 degrees to one side of the speaker and slightly above eye level. A softbox or a diffused LED panel gives a gentle, even look.
- Fill light. A weaker light on the other side that softens the shadows created by the key. It can be a second lamp at lower power, or simply a reflector or a white wall.
- Back light. A small light behind the speaker, aimed at their shoulders and hair. It adds a thin outline that lifts them off the background.
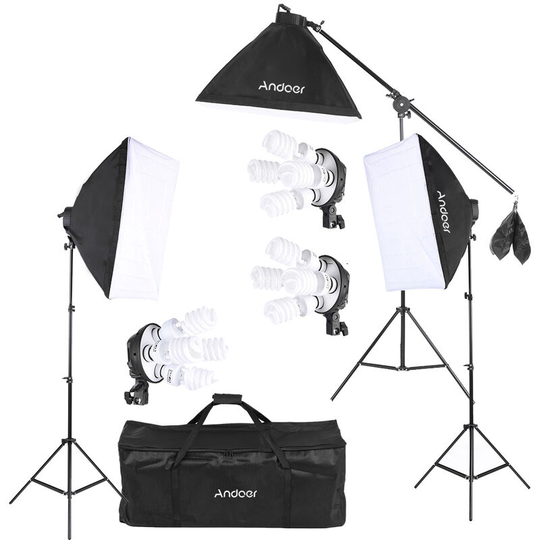
If you only have one light, use it as the key and let a window or a reflector act as the fill. If you are building a setup from scratch, a kit with several stands and softboxes, such as this studio lighting kit with three softboxes, covers all three positions. You can compare other options in our lighting category.
Keep the colour consistent
Different light sources have different colour temperatures. Daylight is cool and blue, many office bulbs are warmer, and mixing them can make skin look slightly green or orange in different parts of the frame.
- Try to use one type of light for the whole scene. Either work with daylight and lights set to a daylight value, or close the blinds and rely only on your own lamps.
- Set the white balance on your camera manually rather than leaving it on auto, so it does not shift halfway through a take.
- If your LED panels are bi-colour, match them to the strongest light in the room.
Common mistakes to avoid
- Lights placed too low. Light coming from below the face looks unnatural. Keep the key light slightly above eye level.
- Too much light. A very bright key flattens the face and can make people squint. Dim the light or move it back.
- Reflections in glasses. Move the key light further to the side or raise it a little until the reflection disappears from the lenses.
- Forgetting the background. A dark, unlit background can look gloomy. A small lamp or a bit of spill light on a plant or shelf adds depth.
- Not testing first. Record a short clip and watch it on a larger screen before the real shoot. Problems that are invisible on a camera screen are easy to spot on a monitor.
A short checklist before you record
- Overhead lights off or reduced
- Speaker positioned away from the wall, window to the side
- Key, fill and back light in place
- White balance set manually
- Test clip recorded and checked
Good lighting does not have to be complicated. Once you have a setup that works in your office, take a photo of it and note the light positions, so the next video looks just as consistent.